Twin 750 Twin Starter Clutch Failures!
The story of my starter clutch failures can be found here:
http://kzrider.com/index.php?option=com_kunena&Itemid=116&func=view&id=143225&catid=2#143225
Carbs
Bike #1, KZ400
#746D
Primary (Main) Air Jet: 60
Secondary (Slow) Air Jet: 90
Starter Jet: 72
Pilot Jet: 35
Main Jet: 130 (was 125 stock)
Slow Jet: 35
Needle Jet: 303011
Bike #4, KZ400
#746E
Primary (Main) Air Jet: 60
Secondary (Slow) Air Jet: 90
Starter Jet: 72
Pilot Jet: 35
Main Jet: 125
Slow Jet: 35
Needle Jet: 303011
Fork Diameters
My 750's forks are 36mm diameter.
My 400's forks are 33mm diameter.
My 750 Valve Settings
Here's my valve settings on 750 #1, late July '06:
L-ex:.102, 2.65 R-ex:.076, 2.70
L-in:.064, 2.45 R-in:.076, 2.56
...replaced L-in with a 2.40, check later in season
Here's my valve settings on 750 #2, late March '07:
L-ex:.064, ?.?? R-ex:.064, ?.??
L-in:.076, ?.?? R-in:.064, ?.??
...and again mid-March '09, apparently with the engine colder:
L-ex:.076, 255 R-ex:.064, 260
L-in:.102, 245 R-in:.102, 255
My 400 Engine numbers
#1 Bike, current: K4E 070853 (square around cam) late '76 D3
#4 Bike, current: K4E 032253 (round around cam) '75 D2
#1 Bike, damaged, removed: K4E 026801 (round) '75 D2
From '76 frame: K4E 058322 (square) early '76 D3, US-made
Spare, junk: K4E 013567 (round) '74 D
O-Ring Info
The O-ring for the camchain tensioner cover on the 750 appears to be:
I.D.: ~20mm
O.D.: ~24mm
Th.: ~2mm
...therefore, the 3/4" I.D. ones from the hardware store do not fit properly; they equate to about 19mm I.D.
The channel in the camchain tensioner cover itself is:
I.D.: 20.5mm
O.D.: 25.5mm
...the part number is 92055-095 ($10.50 on bikebandit)
The figure-8-shaped Oil Pump / Oil Filter O-Ring (stock part #92055-084) is *included* in the Fram ch6014 oil filter, available from DennisKirk.com (careful: note that z1enterprises.com has the 6013 as the filter for the 750 twin, and it does NOT include this special o-ring). Seperately, the o-ring costs $17.74 from BikeBandit.
Fuel Line
For the 750
I have moved my thoughts on this here:
http://kz750twins.com/?p=293
For the 400
For the 400, using the same fuel line kit as above, and the same little conical brass-element filters.
Cut it into pieces like this:
For the line to the left carb: Sitting on the left side of the motorcycle, facing the petcock, cut a 1 3/4" piece to go from the right-side petcock spout to the filter. Then a 10 1/2" piece to go from the filter, under the throttle cables, bend over the top of the right carb, between the frame spine and breather hose, and down to the left carb inlet.
For the line to the right carb: Cut a 3 1/2" piece to go from the left-side petcock spout to the inline filter. From the filter to the right carb, use the remaining 8" or so of line.
This method staggers the filters, and helps keep them straight as possible, and off the engine heat.
In summary:
L: Right Petcock -> 1 3/4" -> Filter -> 10 1/2" -> Left Carb
R: Left Petcock -> 3 1/2" -> Filter -> 8" -> Right Carb
Gas Tank Rust Removal
I have tried electrolysis and phosphoric acid *alone* before in a different tank, and BOTH methods *would* have been great if I had done some sort of abrasive clean FIRST, like the BBs. The problem was that both methods could not alone get the rust from where underneath the "gunk" spots in the tank, because they were *protected* by the gunk. As a result, slightly raised areas of gunk-covered metal were left behind. At least this demonstrates the power of the electrolysis method... ;)
The tank I did this with had been sitting for many years with the previous owner, no petcock, well-dried. So I actually didn't need to do any pre-rinse, and I'm not sure what I would have used. Probably water and blow dry and hair dryer, since you're removing any flash rust in the next steps anyway.
I got a little clear plastic bottle with a red cap of BBs, I think it was 1500? Geez, I really don't remember how many were in there. The bottle, from memory, was about 2-3 inches thick and maybe 3 or so inches tall. Just BBs alone in the tank.
The petcock was already removed, so I blocked off my petcock openings, and I poured all the BBs in the tank. I wrapped the tank in an old comforter, and duct-taped it around in two directions. I stuffed the dryer with a BUNCH of blankets, about 3/4 full. I put the tank in, and stuffed more blankets around the top. I ran the dryer for 30 minutes, no heat. That's NO HEAT, got it!?!?!? Afterward, I took the tank out, reversed it, put it back in, and another 30 minutes with NO HEAT.
To get the BBs out, I used a combination of "rocking" it back and forth upside down, and a "wand"-style magnet.
Then I used a compressor to blow out a bunch of the dust. I decided not to "rinse" with water here, since the next step would effectively rinse anyway.
When most of the dust was gone (as much as would blow out, and it did take a while), I poured a little bottle of Naval Jelly in (see below for update), and sloshed it around. I decided not to "rinse" with water first, since the Naval Jelly would effectively rinse anyway.
Ten minutes of rolling and sloshing, then I rinsed with water. The tank looked awesome.
Then I immediately used a hair dryer and sunshine on a nice warm low-humidity day to get the rest of the water out.
Once the water was out, I got the petcock (freshly cleaned and rebuilt) back on gas in there asap. Or, you might want to get some thin oil in there to slosh around if you're going to store it for a while.
FOLLOW-UP: In hindsight, there needs to be more rinsing. I'm considering adding a mix of water and dishsoap or simple green or something to the BBs/agitation part. Or maybe a bottle of "Prep and Etch" from Home Depot instead of the Naval Jelly in that step. There just needs to me more liquid in the second step, for coverage and cleansing. This should help keep the dust down as well, but most importantly get more of the loose debris out. After doing it as described above, I've had quite a bit of leftover debris that clogs my first set of inline fuel filters in a week or two, and they needed to be replaced. It goes away after that, but still...
MORE FOLLOW-UP: In mid 2009, I did one of my tanks like this: Dropped a piece of chain (like for a swingset) in and rolled it around for less than a half-hour by hand. Blew out most (but not all) dust with compressor. Added about 1/3 bottle of "Prep & Etch", shook for a few minutes. Dump it out, rinse with hose water, and IMMEDIATELY dry with hair dryer in the sun (dry as much as you can until the hair dryer dies ;) ). Then, install petcock, add fuel (or oil for storage).
Why the name Biquetoast??
I really wish I had an interesting answer.
It actually comes from my buddy and I mountainbiking in the 90's. We we pretty good riders, but we just didn't have the money and gear that others had. All the other guys with the camel-backs and personalized sport shirts with team logos and all that. We used to joke about how we weren't cool enough, and that we were far too "Milquetoast" about it all. We thought that we were pretty darn good riders, but we didn't care about "looking" the role.
Anyway, for a gag, we made up silly riding gear (on the cheap) that all said "Biquetoast" all over it as a joke team name. Most people didn't think it was funny, but we thought it freaking hilarious.
Since then, we don't mountainbike anymore, but my riding buddy and I are still friends and we use that name on ocaision for silly stuff. When I registered for kzrider.com back in '03, it was the first thing that came to mind. The natural evolution from mountainbikes to motorbikes, I guess.
By the way, my buddy made the two "Biquetoast" logos for me, and it kinda became even MORE fitting after the bike was crashed... since the "bique" was now "toast"...
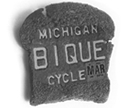
Now I have custom plates on a couple of my bikes: "BIQUE" on the rebuilt 400, and "TOAST" on my 750 #2.
Not that interesting of a story, but now you know... ;)